Archive for November 2010
1. Hold the camera steady with your elbows close to your body, or propped on something stable (table, bench, etc.) OR use a tripod.
2. Don’t be afraid of angles or changing your orientation (portrait or landscape).
3. Before pressing the shutter button, check your focus points. Is your photo focused on the subject or on something in the foreground or background?
4. Check your camera settings before shooting photos…Are they correct for the current conditions? ie: ISO, Shutter Speed, White Balance, etc.
5. Listen to your teacher (if in a classroom situation) AND use great resources such as DPS!
6. Listen to experienced photographers. Also, view and study works of other photographers. This helps provide different perspectives and inspiration.
7. Learn how to use the Macro settings (or Macro lens) for your camera. Give the smallest details of nature great importance!
8. Use the continuous shooting mode to capture movement.
9. Take LOTS and LOTS of pictures!
10. Have FUN!


There are 3 basic rules for sketching outdoors:
1. First, determine your horizon line, making sure that all your receding lines converge properly.
Sketch the general contours of the big shapes. Keep them fairly angular and avoid drawing details too soon.
2. Second, the same advice applies to shading.
Indicate the large masses first, in simple light and shade.
Avoid using halftones at this stage. Watch your source of light and keep it consistent.
3. Third, put in the half-tones, constantly checking the relationship of the light and dark values.
Then render the details and necessary accents in the final stage to complete the picture
As you can see, these rules are very simple and easy to follow.
Now go out there, and do some sketching!


Clay animation is an interesting style with a lot of possibilities. Like any type of animation, it has the potential to depict events that could not possibly happen in real life. It also has a unique, solid look, and can be a relatively easy type of animation to get started with as long as you have the right type of camera. Read on to learn how to make clay animation.
Instructions
Build your characters and scenery. The simpler they are, the easier they will be to manipulate without smearing their features. However, you do want to make sure that characters are identifiable and have expressive personalities, so put some thought into this step. Make everything small enough to fit on a table top together.
Set up your filming location. Cover your work surface with an appropriate backdrop. A plain sheet draped over the table and possibly also any walls in the shot can help to remove any unwanted elements. Make sure your area is well lit. Frame the scene you want in your camera, and secure the camera on a tripod or other stable surface. Holding it while you shoot will not produce consistent results.
Use your characters and scenery to build the first scene you want to shoot. Use the special button to shoot a few frames.
Advance whatever action you want in as small an increment as possible. You can start to move your characters or change their facial expressions, for example. Pick items up as little as possible, and if you do pick something up, use a temporary marker to make sure you put it back in exactly the right place. Most of all, make incredibly small changes for each shot. When you're ready, shoot a few more frames.
If possible, view your video after several shots to see how it is going. In particular, see if you need to move the action at a different pace. Make sure to start again precisely where you stopped.
Finish the action you want to create, using the adjust and shoot process many, many times. In professional studios, this process can take many days for a few minutes of film, but you can make a passable simple piece in a few hours.
Add a sound track. Since it's basically impossible to get any good sound during the initial shooting process, you will need to add any music, speech or sound effects that you want at the end.

PLACEMENT CELL
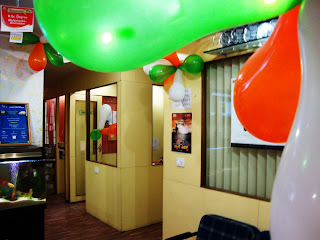
Placement cell at Arena, Jayanagar is the most active and the happening place in the center. Placement Officertalks to the students ready for placements, evaluate their skills, understand their background and accordingly fix up training on Resume writing, Interview facing, Portfolio Development and Corporate etiquettes. Placement cell also conducts communication classes for students weak in English. Campus Interviews are held at a regular interval to place the students, completing the course.
ACADEMIC TEAM
- , |
ACADEMIC TEAM
- , |
ARENA FACILITIES
- , |


